Saturday, August 19, 2017

Quick Tip: Dealing with Mysterious Shrinking Tuning Peg Holes

I've been restoring what I believe is an '82 Aria ZZ Deluxe for some time. I say believe because I don't have the original neck plate. And a catalog that would verify if it is '82 or '83 is hard to find! So this guess is based on various other blogs and forums where I've come across something that looks like it was from the same year. I'll do a whole post on this guitar once it's working.

Problem: Pegs No Longer Fit in the Headstock!

However, I ran into a problem the other night while reinstalling the tuning pegs. This guitar was bought as a "pile of parts". So I'm lucky to have all 6 original tuners. When I went to put them in, many were hard to push through. And the two in the middle just wouldn't go. I actually slipped with a clamp and took a little nip out of the headstock trying to push the G in!

Redrilling Seems Dangerous

Certainly wood swells in the summer. And it's hot right now. But beyond that, this headstock has been broken once right down the tuning peg holes and re-glued. I also noticed a lot of gunk on the inside of the holes. So I was hesitant to grab the bit that matched the size of the tuner and just re-drill. Too much could go wrong here.

Solution: Use the Threading of a Smaller Drill Bit

I ended up taking a brand new smaller 6.4mm drill bit that was still oily from its original packaging. This is a higher quality Makita bit I got a good deal on during the last Prime Day. So there are no poorly machined jagged edges or anything along the threading.


I put the bit through and up against the side of the channel. Started the drill at relatively low speed and then just rotated it around the hole. A bit of build up was knocked out. But I wasn't getting through the finish or the wood. Plus there was some exchange of sticky oil between the bit and the channel.


The result after a few seconds: the tuners slide in firmly but without any further major abuse to the guitar!


Next time you're contemplating redrilling on a finished neck because parts are mysteriously no longer fitting into place, it might be worth giving this a try first.

Sunday, July 30, 2017

Blue Flying V Kit Build: Part 2

Every project that takes longer than a day has that point where everything has gone wrong. And you're prepared to just try to shove the whole thing into your trash chute. I just didn't expect it to come so early on this guitar. Last time I described the kickoff of this project. Based on lessons I previously learned with a set neck, glue first then start finishing everything seemed like the way to go. Of course, there are always more lessons to learn.

The Old Plan

I have very limited time to devote to my guitar building hobby. So it's vital to have a plan to eventually see results. After getting the blue that I wanted, my plan was:
  • Wait for the hardware (tune-o-matic, tuners, strap locks, etc), ordered off eBay, to come.
  • Measure and drill before applying TruOil to the guitar so as to avoid scratching up the finish.
  • Kick off the long, long TruOil process with a twice a day application schedule.
  • Two weeks for the TruOil to cure.
  • Shape and install the nut, buff the TruOil and do fret leveling and dressing.
  • Electronics installation. I've already got the pickups.
  • Play it.
This was almost a good plan. Let's see how it turned out.

Hardware and Pickups

Everything arrived within a couple weeks. Most of the hardware was shipped from China. The pickups were shipped from within the U.S.

Bridge: Low-End Nashville Style Gold Tune-O-Matic

The bridge price was as low as I could find.


This is marketed as an ABR-1 bridge. That's incorrect. It is a Nashville style tune-o-matic with large posts and bushings. This article on the Stewmac site does a good job of explaining the difference. It also provides plenty of tips which I wish I would have read before I went to install this thing. But more on that later!

Tuners: Possibly Fake Grover Half Moons

The tuners are great. They seem well constructed. I've bought a range of tuners on the lower end of the price spectrum and I figured I was getting a good deal on the lowest end of Grovers on eBay. However actually seeing them, I think these are "fake" or possibly "sold out the factory backdoor" Grovers.


I went back to recheck the listing. I had noticed the logo engraved when I made the purchased. Looking closer, it looks like the lister purposely blurred the logo. But rather badly. And it doesn't claim anywhere outside of the pictures they're branded at all. If I hold them next to a set that came on an Epiphone Les Paul I own, I can tell the engraving of the logo isn't quite the same. Doesn't look too legit. Anyway, I won't be selling this. Especially after how the bridge install went. And if I ever wanted to I can swap them out to avoid selling some bad merchandise. Fakes or not, the quality seems worth the price. They're well constructed.

Pickups: Dragonfire X2N Power Rails

I've purchased several pickup sets from Dragonfire guitars. This is the first set of X2N's I'll be trying out.


The choice here was partially due to my recent acquisition of an Aria ZZ Bladerunner with very similar, though much older pickups in it. I'm excited to see how they stack up! From everything I've read online, Dragonfire's pickups are Artecs wound to their spec in bulk. Note the amusing warning about fake Artecs on the Artec website. Don't get me wrong. I've found these pickups to be great so far. But they're mostly copies of some of the high-end brand models like D Activators. And it is true. There are many other pickups on Amazon and eBay now that look like, you guessed it, copies of copies. Or it's a giant conspiracy and they're all the same thing. Even the brand names. And I'm getting ripped off? ¯\_(ツ)_/¯

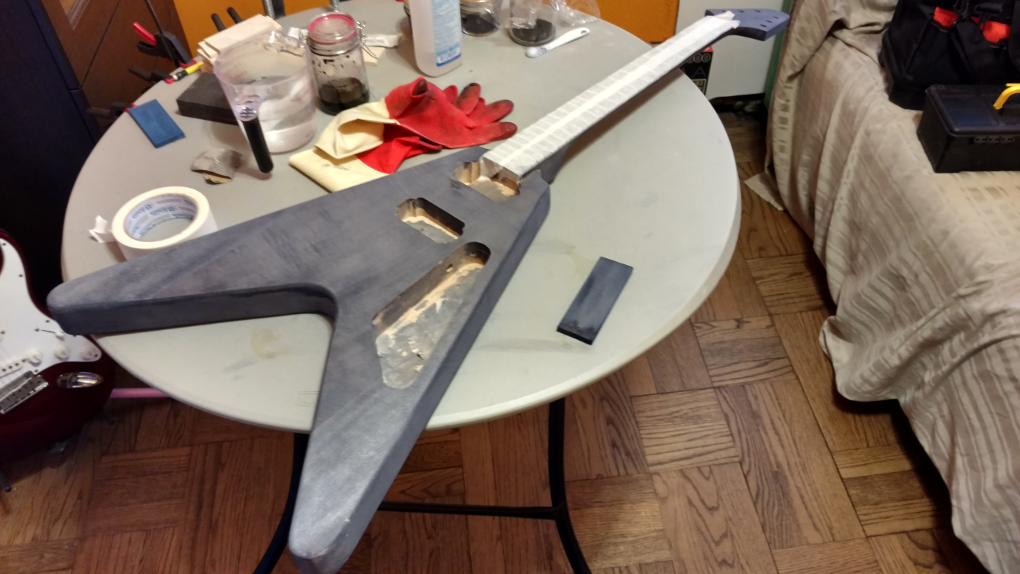
Fail One: Dropping the Bit

It has been a few weeks since I dyed the guitar blue. I thought ahead though. I kept some extra dye. So when I dropped this monstrous pen fluting bit right onto the body and introduced a nice gauge, exposing the natural color of the mahogany again, I thought whew - glad I have that dye.


Now even before applying the dye, I had some worries. Was the dye too old? Did it need to be heated? Is shaking the bottle enough to mix it? It turned out the answers to these questions were yes, probably doesn't matter and no. But despite this, that surface scratch was begging me to do something to it. So I rushed, grabbed a bit of paper towel, shook the jar, dipped it and proceeded to rub a big gray splotch right into the body.


I even got out some 800 grit and thought I could "smooth it around" or something. That just made it worse. In hindsight just about nothing I was doing was logical. When you make a mistake the worst thing to do is rush to fix it. And I rushed to fix it. Within a few minutes, I knew I was in for re-sanding and re-dying either just the top or the whole guitar. So I decided to move on and finish the hardware fitting.

Fail Two: Eyeballing the Bridge

Looking back at my state of mind at the time, I'm pretty sure it was "well, it can't get much worse". I was ready to take some risk. I'll note up front that installing posts for a tune-o-matic bridge is new for me. I've never done it. I have pre-drilled blanks. I have a cheap SG someone else built from a kit. And I have two Les Pauls. All of these have your standard Nashville bridge with the large posts. Here's an example from an Epiphone Les Paul Studio.


Note the slight angle of the bridge install. This is necessary on the low strings in order to keep them in intonation range. Somewhere right after the thought of "will this thing fit in my $15 Black and Decker drill" and "did I charge it?"


I decided I needed a beer. On the way to get that beer I thought "maybe I should make a paper template?". By the time I got back to my work room with my beer that thought had vanished. I taped along the fretboard lines to provide horizontal guides. I checked the scale length for the first time. A little off. Whew. I took the bridge and laid it on the body. Traced some lines to ensure the saddles would fall well in the middle of intonation range. I know what happens when you get this wrong. The SG I mentioned above got it wrong - partially why I got it so cheap. I eyeball compensated for heights and angles using some clamps to hold a soft tape measure against the fretboard running down from the edge of the nut position. I double checked everything. And then triple checked everything. Including the angle of the bridge. I have no regrets on how this part went.

Then came the actual drilling. Anyone sane uses drill presses for this stuff. But I don't know what I'm doing. And more importantly, I'm in an NYC apartment. I don't have a legit workshop. So I took the same drill I bought to install $3 curtains I bought at a dollar store many years ago, put the bit against the wood and gave it a try.


The good news somehow I got the post distances right. And measuring after the fact, the angle of the bridge is still in range. Whew. This wasn't by luck at all. It was surely the beer. The angle is more extreme but it's still going to work.


The tail piece. Well, that one is angled up toward the bridge on the low end. Now that shouldn't impact anything except tension. And of course, looks that make this thing unsellable in the future.


You might also observe that the tailpiece is just sitting there. No magic. I don't live in a spaceship. I give credit to the beer for ensuring the post spacing still made a fit possible. But it's tight. Tight enough that the tailpiece holds itself in place. Looking at the positive side I guess I won't need to glue the posts. Pressure pretty much keeps everything in place.


The bright side of this is that my drilling mishaps resulted in what I believe will be a playable instrument that's pretty close to well intonated! Maybe. The dark side is it looks like it was drilled by an idiot. Or beer.

At Least the Tuners Look Nice

These installed without a problem. The holes were pre-drilled though so I can't take much credit. I eyeballed lining them up parallel to the headstock edge.

Lessons Learned

Wood Dye: Full Coats or No Coats

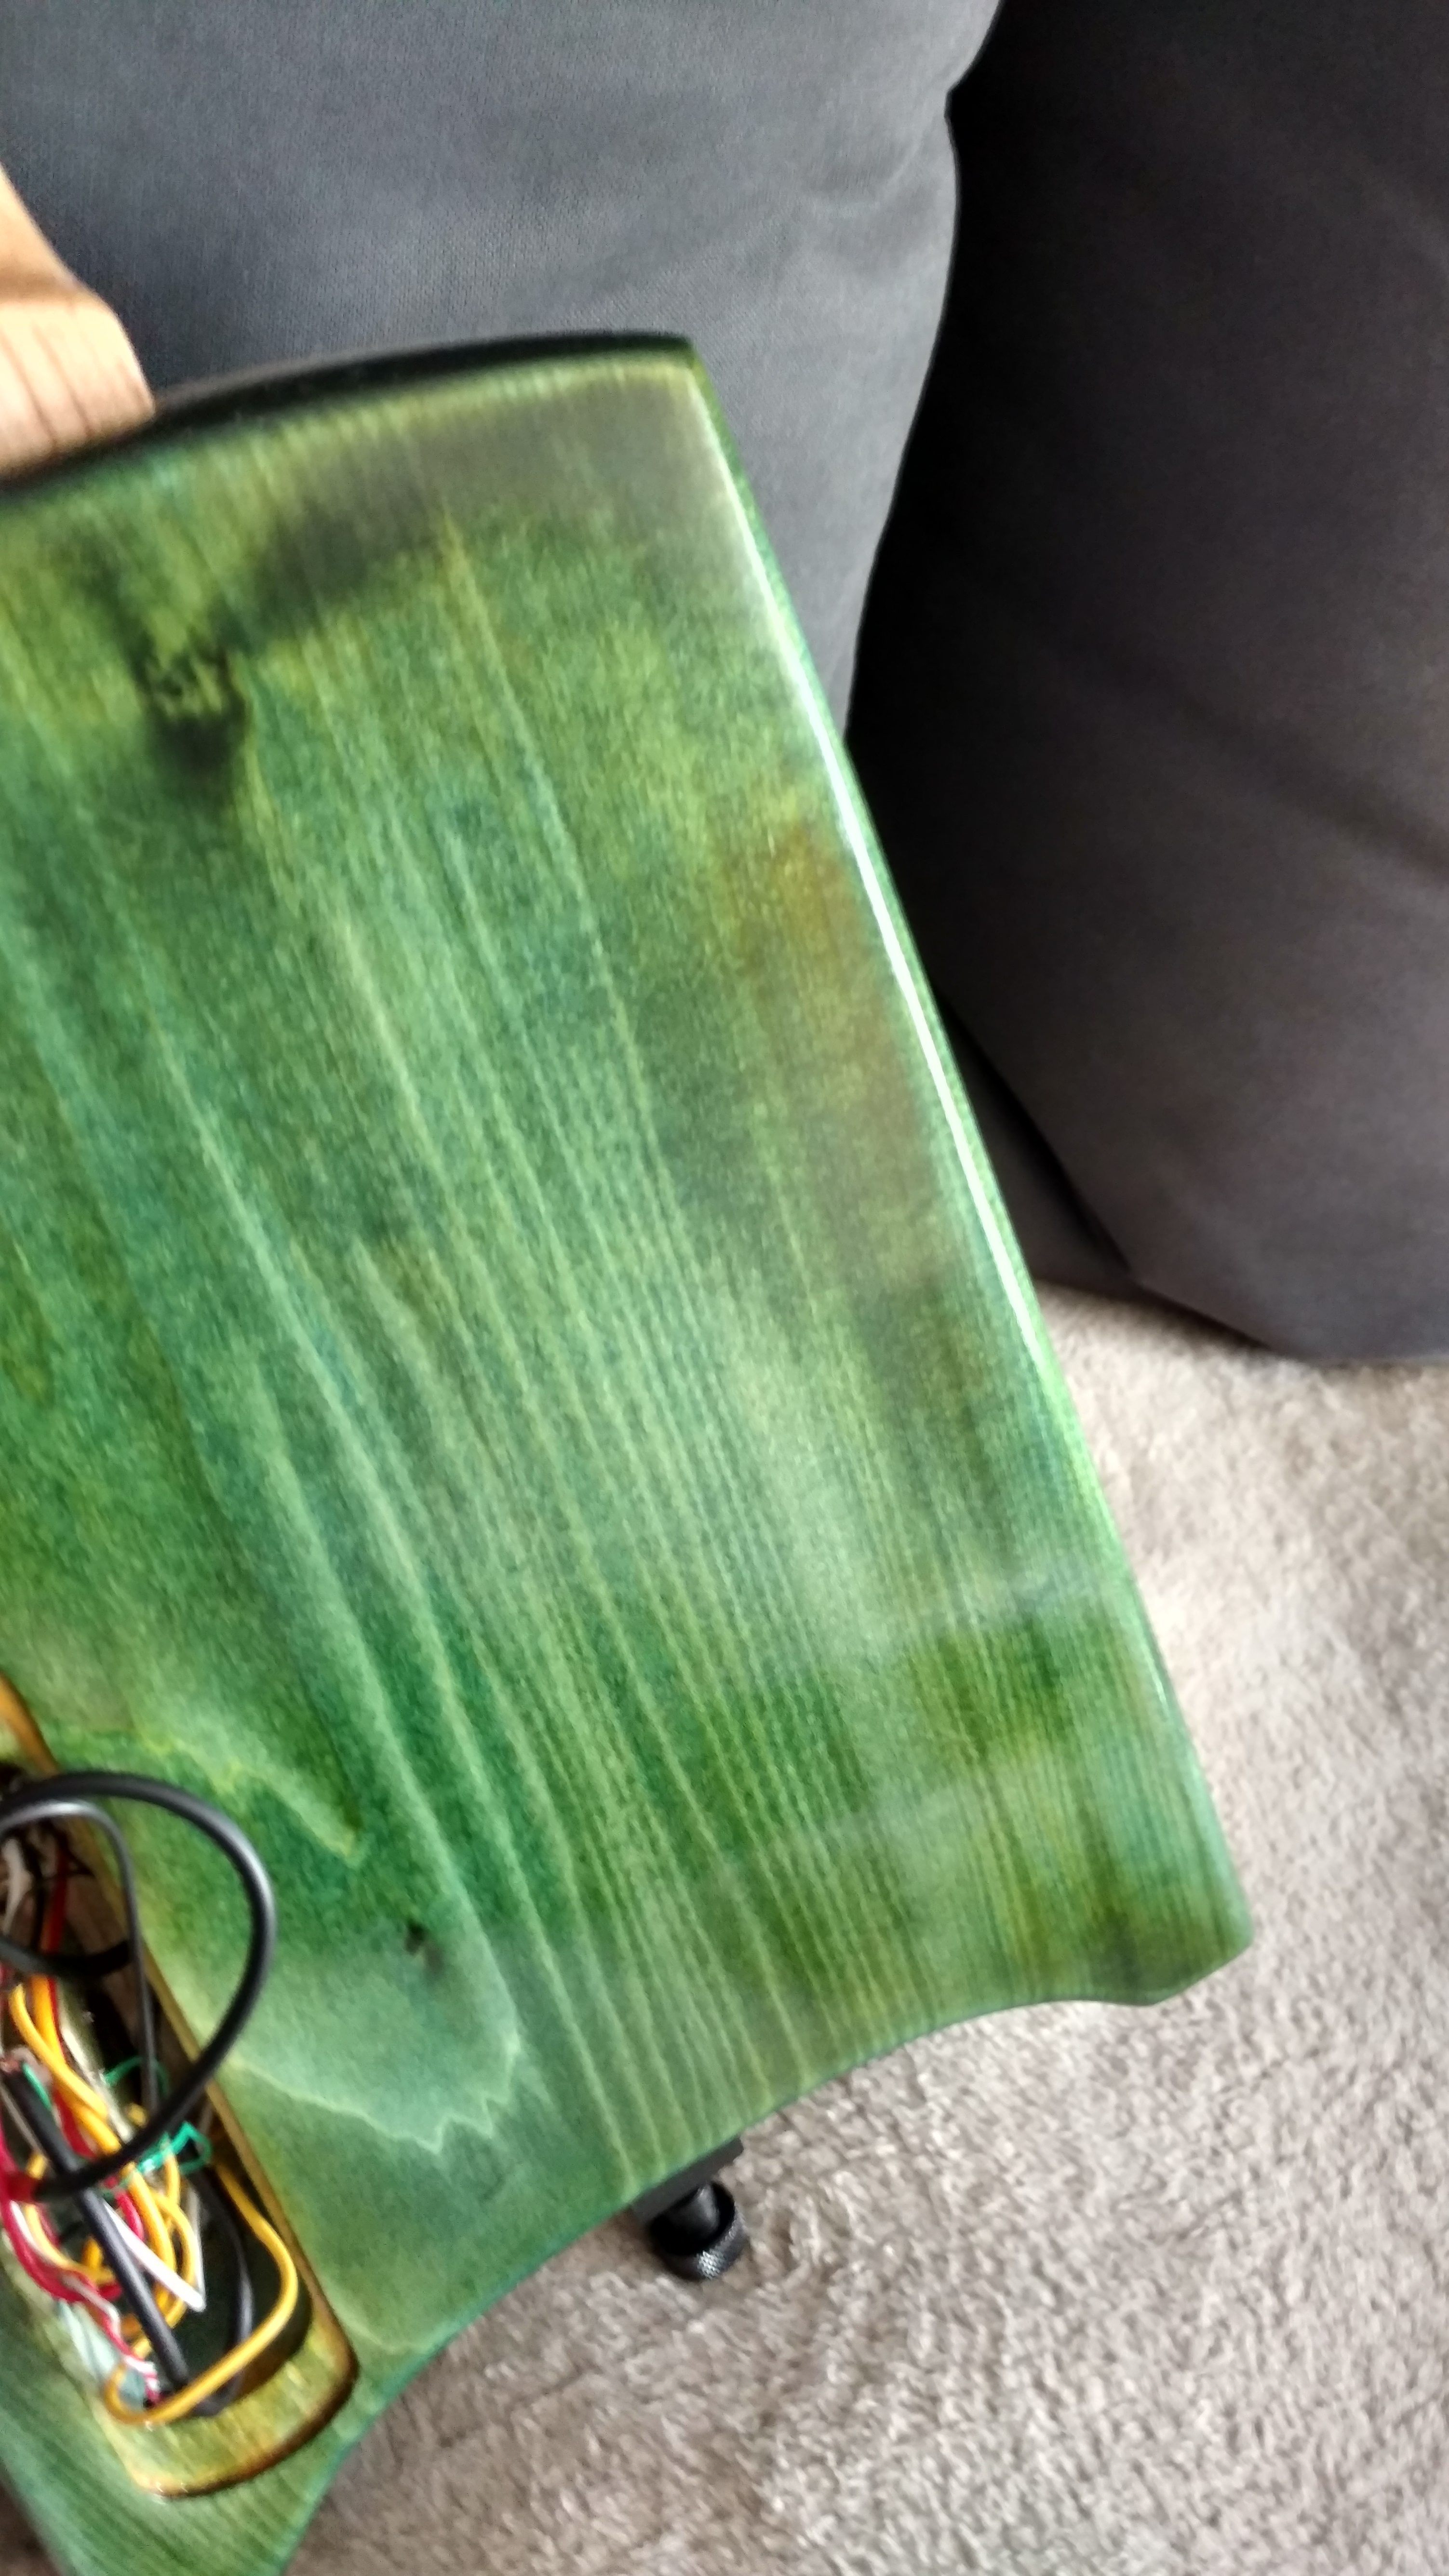
Every time I've used these dyes I've found that if I do an entire coat I get a reasonable result. If I sand it off and do an entire full second, third or fourth coat, nice. If I try to touch up spots I get splotches, lines, droplet marks in the end grain and just about any other non-desirable feature of a dyed piece of wood to come through. Do the whole thing in one sitting and mix new dye seems to get the best results.

Don't Drop Stuff

Or more practically, cover the work surface. I was being careless because I hadn't applied oil yet. I forgot that the dye doesn't go that deep. And even if it did, the last thing you want is a big chip taken out of the wood.

Use Templates

The most obvious thing to do would have been to print a paper template, cut it into a cheap board, lay it on the guitar body, line it up, clamp it on and drill through it. Even without a press that seems like it would have been a pretty fool proof strategy. Next time. What I haven't figured out is if I attempt to do this on a carved top.

The New Plan

The new plan from here:
  • Shape and install the nut, do fret leveling and dressing.
  • I'm considering cutting and gluing a veneer on the headstock (dyed figured maple).
  • Kick off the long, long TruOil process with a twice a day application schedule.
  • Two weeks for the TruOil to cure.
  • Electronics installation.
  • Play it.
The additional step of adding a headstock veneer is just to calm a worry I've had about how porous this mahogany is. I know it's not high-grade wood. I want to play this thing. I like to use thick/thin gauge strings. So a few millimeters of hardwood glued onto the headstock will not only give it a distinctive look. But will hopefully add a bit of strength and tuning stability to a softer headstock. And besides, based on how this build is going so far, I need more challenges. Here's where I'm at.

More updates to come.

Tuesday, July 18, 2017

Blue Flying V Kit Build: Part 1

Earlier I mentioned a project that involves dying a lower grade mahogany blue to get something close to the effect seem on a transparent blue Aria Pro II SG clone. This is part one of that project. Nothing has gone as planned.

The Glue

This is the second budget set neck kit I'm building. It's again a short open mortise and tenon joint, I think. I took it right out of the box, put way too much Original Titebond on it and put the clamps on. So I forgot to take any pictures before I started.


One nice thing about this kit is that none of the holes are drilled for the bridge. I could do tune-o-matic and tailpiece. Wrap around tune-o-matic. String through body tune-o-matic. Since I don't have a router, I could drill and chisel out a tremolo cavity if I really wanted to! I probably won't. But the nice thing is that I didn't really need to worry too much about getting the neck position exactly right. Unless I wanted to add a traditional flying V pick guard. Whoops!

Best practice is to let this sit 24 hours. I actually uncamped it after about 12 because I had thought I messed it up when I checked on it in the morning. Then I put the clamps back on for another 36. I was too busy for the next couple days to get to it.

The Wood

One thing I noticed right away is that the body is three pieces. The glue joints aren't great. There's a bit of a gap around one of them. And the color of the wood around the joints isn't well matched. I've circled some of the imperfection below.


This mahogany was meant to be painted. But I'm not going to paint it. That wouldn't be fun. Even if the wood has visible imperfections, a finish that shows what the guitar is made of is interesting. I have enough painted instruments.

The Sanding

Since I planned to use Keda Dyes it was time to do - as the instructions tell you - the most important thing: prep the wood. Basically sand it with 120/150 grit consistently. I got out the sanding block and went to work with 120. However, as I was working I started noticing more and more imperfections that were both annoying and fixable. For example some glue spots around the body joints. So I got out this little guy with 90 grit paper for the first time.


I picked this up from walmart.com on the cheap. It's great that it has a dust bag. Unfortunately, absolutely none of the dust went into the bag. I'm not sure why it's there at all. Instead, the dust frosted everything in my office. Lesson learned. Next time I use it, I'm going to at least cover some of the electronics. 90 grit left it rough and exposed the porous grain of the wood. It was also abrasive enough to allow me to eyeball changing the neck profile a bit. I sanded it a little flatter. Not super thin. But not as vintage round as the kit came. I'm really happy with the neck reshaping. I have zero confidence I could do it again. Just going at something you're holding with one hand with a power sander and a shop vac tube in the other to change its shape significantly sounds like it could end, at worst, with lots of skin loss. I lucked out. Whew.

The Dye: Concept

The goal was to darken the grain. Leave the field of the wood lighter. Have the blue take strongly to the field. And have the grain show through with a high level of contrast. Even the parts of it that make it obvious it's three unmatched pieces of wood glued together.

Admittedly I have no idea what I'm doing. But my thought was to die the whole thing dark grey (near black if oiled), then sand it back off hoping that the die would take more deeply to the grain than the field. Then I'll apply the blue on top. I have other posts describing the mix for the blue and grey. But here are both together.

First Dye: Black/Grey

As expected these unmatched pieces are all over the place. The middle piece has some nice flame figure on it.


The left wing took the dye much darker than the right. The joint lines show through super clear. Not a great cut of wood for a solid color. But like I said above, I'm not going to worry about it too much.

More Sanding

The fun really started when sanding off enough of the dyed wood to leave some of the grey dye in the grain and pores. But expose enough of the raw wood so that there's space to take on the blue. This is my first time trying this method on mahogany. What I didn't expect was how uniform the wood was going to be. And as a result, how much sanding I would need to do. to get the grey off in away that didn't end looking sloppy. So I started with 120 grit and a block.


And kept sanding.


It's summer. And I don't have air conditioning in my office, where I do this work. I was prepared. Jorts and all. But it by this point I was dripping with sweat. I had only sanded the back side. And I was getting desperate. So I got out a super course (I forgot the grit) sanding sponge that I this is meant for drywall, not wood.


That sped things up a bit. For a little while. Until most of the large sand particles had de-sponged. You can see the problem here.


Mahagony is a porous wood. So it takes on dye deeply. But the grain is also very subtle. There isn't much figuring. So I kept sweating as I tried to wear down more of what I had dyed. Only to see something that looked a lot like the original wood. This was about two hours in.


And I looked like I had gone jogging. It was time for something desperate. Although I wasn't very excited about putting yet another thin layer of dust over everything in the room, I grabbed the shop vac nozzle with one hand, the power sander with the other, put gloves on and a mask on and went at it again.


If you're wondering from this picture if I had dust all over the Strat on the left of the photo: yes. It needed a good cleaning afterward. Lesson learned - next time I'll move the other guitars out of the room. Finally, I had a decent amount of the grey worked out.


And here.


If only I had just been using the power tools from the beginning!

Second Dye: Blue

This part of the process was less work. But no less dramatic. The Keda dye flow chart mentions warm water a lot. I mixed my blue dye earlier in the day so at this point, I decided it was time to warm it up. I do this by boiling some water, taking a little plastic dish, pouring the boiling water into that dish, then setting a small picking jar full of the mixed die in the hot water. In a couple of minutes, it's bath water hot. Here's an action shot of the dye going on.


And the next day: the glue joints are of course both still very visible.


On the back, you can see a much darker stripe of blue on the right side. That dark ring goes right through the wood can be seen on the left of the front as well.


My "bring out the grain" strategy sort of backfired on me. I found it. It just wasn't what I was hoping for.


The headstock photo here shows the pores pretty clearly. The red-brown wood can still be seen through the dye. It is not what I planned. It is a bit odd. But I'm still excited. At a minimum, this is going to look interesting when finished.

What's Next?

The next steps are to sand lightly with higher grits. The goal is to not remove any dye. But to smooth out some of the very rough areas left by the 90 grit power sanding. From there I'll be applying Birchwood Casey grain filler. And then onto an uncountable number of coats of Tru-Oil. A mistake. Or two. Lots of sanding. And then another few thousand coats of Tru-Oil.

But before all of that, I've learned my lessons finishing before I've drilled for all the hardware. I made that mistake before. I decided given how dark it is turning out, it's going to look good with gold hardware. The kit came with chrome. To make sure there are no mistakes, I'm going to put everything else on hold until I get the parts. Which are on 1-2 month eBay shipping. It's a cheap kit. I'm going for value parts. Not top shelf quality on the hardware. Though I was lucky to get a set of lower end Grovers (like the ones on some Epiphone LPs) for $12. Hopefully. If they ever arrive.

Saturday, July 15, 2017

1985 Aria Pro II ZZ Bladerunner-KV

A few weeks ago I saw this black 1985 Aria Pro II ZZ Bladerunner in my Reverb email feed. I already owned two Aria Pro II ZZ's: a red '85 Standard and a red '82 (I think) Deluxe that I've been rebuilding from a pile of parts for some time. I'll eventually blog about those. I've caught a bug though. I'm addicted to these things.

The Deal

At the original price, I was looking but not buying this guitar. Then the seller dropped the price significantly twice over the course of the next couple of days. And he was nice enough to bargain back and forth with me for a bit more. Thank you! Because Reverb, and used gear in general, is a dealer market, I'm not disclosing the final sale price.

Condition: Thanks, UPS!

What really excited me about this guitar was the condition. I love playing the '85 Standard but it's pretty beat up. I've done enough work on the Deluxe that I know I'll love playing it when it's ready, but there are cracks going right through the body. I knew that getting into the project. You can't expect one of these, given their shape, to survive 30+ years without some dings and dents. Clumbsy pointed shape aside, I don't think they were the instrument anyone was thinking about being sought out during their prime time. So they were played rough. All the more reason to seek them out now!

This ZZ was in great shape from the photos. Great price, somewhat rare find, and in good condition. I was excited to unbox it! It arrived. I cut the tape. Started pulling out wads of paper. The seller did a great job packing it. All the corners had inches of cushioning. I didn't take a picture of the packing job, but really - it was good. Despite that, I pulled the guitar out to find it looked like someone got hungry.


And there it was. Sitting in the box.


Again I'll stress here, UPS must have really put this thing through hell given the way it was packed. I was sad for a moment and then thought: I still got an excellent deal and this is totally fixable. And it was. I'd like to touch up the finish a bit one day when I have time, but it was a clean break and easy to glue.


I'm missing a bit more paint on the top edge of the body.


Getting it to look as good as new is going to be an exciting challenge for me. Despite how bad it looked upon unboxing, I'm just thankful it broke in an area that really doesn't do anything. What if it had been the neck pocket?!?

Specs

Information on Aria Pro II guitars is scarce but luckily this one is in the catalog collection at matsumoku.org. That's the '86 catalog. The serial number indicates it was produced in '85. Makes sense. Here's a summary.
  • Model: ZZ Bladerunner-KV
  • Origin: Japan, Matsumoku Factory
  • Body: Maple, Beveled Explorer Shape
  • Neck: Maple, Bolt On
  • Fretboard: Rosewood
  • Frets: 22
  • Scale: 25½"
  • Trem: Kahler 2330C Flyer Flat Mount (U.S.)
  • Hardware: Chrome
  • Nut: Graphite, Secondary Lock Nut
  • Pickups: 2 "Hot Blades" Humbuckers, Ceramic/Ferrite
  • Electronics: 1 Vol, 1 Push/Pull Tone (Coil Tapped), 3 Way Selector
Here's a deeper dive into this guitar.

Electronics

At the time Aria was producing two types of hot rails pickups in both humbucking and single coil configurations. These are "type I". Type "II" have thinner rails. Both are ceramic pickups. The catalog lists type I as ferrite specifically.


The catalog does not mention that like every Aria Pro II guitar I've owned with an HH pickup configuration, the tone is a push-pull pot and its switch function when toggled, is to split the humbuckers.


With other pickups the effect of coil tapping is rather pronounced. With these pickups the difference is a little less pronounced. However, the single coil hums don't have this problem! I haven't explored under the back electronics cavity yet but I assume there is little to no shielding. Until I get a chance to clean things up, I'm avoiding pulling out the tone pot.

As humbuckers though I love these. They're high output. I'm not great at writing about sounds so I'll post up a recording at some point. But I'll say that the neck has a ton of string clarity. The bridge is balanced. Lots of output but not over the top. Among pickups I own these are definitely in my top 5 favorites.

Trem

I'm missing one fine tuner and a trem bar. So I've got some eBay hunting to do.


As a player, I am not into using the trem. But as a build and repair hobbyist, I find them to be fascinating pieces of engineering work. I was happy to find that the 2330 Flyer was a popular enough model that they still go for around $100 today when they're in good condition. They don't seem to suffer from the same type of wear as floyds. No knife edge problems. And there are plenty of parts floating around. Here are some useful resources I've come across reading up on it so far.
The nut is interesting. The lock nut is mounted on top of a shim mounted on the headstock behind a graphite nut.


When I first started playing around with it, the lock nut was loosened and I found that it stays in tune well even without it locked. More good news for me. If I don't want to learn to set up this trem, unlike some others, it doesn't seem like I have to!

Playability

This is one of my favorite part about ZZ's in general: the necks. Actually, I've found 80's Aria shredder necks to be pretty consistent. They have some chunk to them. They're not your super thin, flat, fast necks. But they're a bit less rounded than a strat neck. There are a few dings and dents in the neck but nothing that gets in the way. I'm unmotivated to measure, but if I had to guess the fretboard radius I believe it's over 12", less than 14". I couldn't find this information by searching. The frets are in decent shape and the fretboard is held on well - no gaps or ridges developing between the woods.

The one downside in terms of playability is the body shape toward the 21st and 22nd fret. The cut does get right in your hand. A little bit of cutaway on the back of the V, away from the neck pocket, would have made this more pleasant in the design. But less structurally durable.

Overall

I'm happy with this guitar and I see myself playing it often. The only Explorer style guitars I've owned at the time of writing are all Aria Pro II ZZ's. It's nice to have a fun guitar shape with a 25½" scale, an amazing feeling neck and a unique sounding set of pickups. Peoples' opinions are all over the map on whether these old Arias are worth it. Even with a giant bite taken out of it during shipping, I find it hard to make an argument against this one for the price.

Sunday, July 9, 2017

Keda Aniline Dye Recipes: Grey

This is a follow up on this post.

Recipe: Grey

This is simple enough.

simple-grey.png

Here's the formula:
  • 90ml of hot water.
  • 1/8tsp of black dye powder.
This is a bottom coat I'm going to lightly sand off before applying a blue on this work in progress.

v-grey-first-coat.png

Until next time!

Keda Aniline Dye Recipes: Denim Blue

This post explains how to achieve a nice deep blue wood dye shade using a Keda Dye powder kit. I've included a bit of background since this is the first of multiple posts I plan to make on this theme.

Aniline Dyes?

If you're not yet addicted to dying wood using aniline dyes, don't worry. For less than a mere $20, you can be well on your way to the joys and pains of this wonder. I highly recommend checking out Keda Dye for some great, inexpensive dye kits.

Problem: Lack of Available Mixing Recipes

I'm fairly new to this myself. So far I've read blogs and watched YouTube just to get myself to a point of passable basic technique. And that has worked well. However, my color choices have been ad hoc. I'll mix up some dye, apply a coat, the next day modify that die, apply another coat, sand down some of the field, modify the dye, apply another coat and so on. And that's fun. You can end up with something you otherwise would not have imagined.  Here's an example from my first dye project: the basswood body of a budget Steinberger Spirit clone (excuse the mess of wires).

IMG_20170709_135303498_HDR

While definitely not for everyone's taste, I was happy that, with a combination of yellow, light blue, green coats and many coats of Tru Oil, to end up with a finish that I find enjoyable. And that's quite unique for a body wood that is usually painted.

But now I have a project where I have something in mind for the end result. I'm building an inexpensive all low-grade mahogany flying V and despite the imperfections in the wood, I'd like to achieve a color along the lines of this beautiful 80's Aria Pro II Cardinal 350. Conventional advice is the guess and test method: mix up some dye, test it and adjust. And write down what you do as you go in case you need more. That's great advice, but to save others time, why not share what I've written down!

Solution: Dye Recipes and Pictures

My solution to this problem is to get a somewhat nicely figured piece of poplar from Home Depot, chop it into little pieces, use the pieces as testers and write down on them the recipe I'm using. I figured while I'm at it I can start posting online as well just in case it helps someone else get the amounts just right. I sanded them each with 150 grit and I will be wiping them down with isopropyl alcohol to raise the grain shortly before applying the dye.

img_20170709_141246200_hdr.jpg

I chose poplar because it was one of the few dirt cheap pieces of wood I could find on hand that had some nice grain to show. So keep this in mind if you're dying something like mahogany (that's my final target) which may show much darker or maple which will be more stubborn in taking on the dye.

Recipe: Denim Blue

I'm going for a blue that's just light enough to see some grain when standing back but no lighter. Just a bit lighter than my jorts (not pictured here). When using Keda's blue powder remember to keep in mind the special instructions for blue. If mixed with water straight away it will not last more than a workday. Since I do this as a hobby, I have a hard time committing large blocks of time on a project so I mix first with isopropyl and rewarm in a hot water bath before each use.

I had initially started with around 2/8 tsp blue dye powder and 1/8 tsp black dye powder. This resulted, even after a few coats, in something that was too light and too dull. So I continued to add more blue dye powder until I arrived at this result.

cropped-blue-wet-dry

Note that this is not completely dry. This is on purpose. The lighter areas are how it's going to try. The darker area is what it looks like when wet. This should help you if you're trying to replicate it as you're going to be first looking at it while it's wet. The end result, if I counted correctly:
  • 1/8tsp of black dye powder.
  • 2/8tsp of blue dye powder.
  • 30ml isopropyl alcohol.
  • Mix well and wait two minutes.
  • 75ml of hot water.
  • 3/8tsp more of blue dye powder.
That should get you something close to the color shown above.

Aniline Will Dye You

I am a bit too clumsy to wear gloves while mixing the dye but of course I wear them while applying it. It is important to do so if you don't want blue hands. Unfortunately, my glove had developed a hole before today's work! I guess I'm going to with a blue finger.

img_20170709_150622199.jpg

In all seriousness though, while these dies are fairly "non-toxic" compared to most woodworking products, aniline in a high enough dust can be toxic at the "full grams of ingestion" level. More risky perhaps is the fact that this powdered die can easily blow around the room, stick on your feet, you then step on a drip of water in the kitchen and you're leaving blue footprints all over your home. I suggest turning off all fans that blow directly into the area you're working for the short time you have the powders sitting in the open. And if you have one of these, wear it.

img_20170709_143248803_hdr.jpg

I use this while applying sealers and other smelly products that say they'll give me brain damage. And while it's not comfortable, it keeps me from breathing on the dye and either dying my lungs or blowing it all over the room.

I've got a way to go before I'm at a beautiful finish like the one in the link above. So watch for more updates.

For Sale: Seymour Duncan Sentient 8

Update: this pickup sold! This articulate neck humbucker sounds great in darker, warmer instruments (ex: mahogany body with a rosewood fre...